Getting started with script commands
Raycast lets you put productivity ahead of your development processes and workflows.
At Raycast, we know that developers value their productivity over processes. Who could be better at knowing what makes you productive than you? Don't let clunky workflows slow you down - write scripts, add them to Raycast, and let Raycast take your system through the steps rather than you having to manually do it. Script commands automate your own personal workflows and help in managing the continuous context switching that comes with being a developer.
What will Raycast do with scripts?
Raycast executes your local scripts and enables you to perform frequent and useful commands without having to open a terminal window. Your script commands will be beautifully integrated in our UI focused design. Using scripts means that you can instruct your computer to perform a set of instructions, as well as when and how it should do it. We have some great script examples as well as some templates to help you get started in our repository.
Let's take a look at a small but useful script. GitHub is a well-used tool for most developers. We think that checking for pull requests could be smoother - here is the current process:
- Load up your browser
- Click in the search bar
- Type Github
- Load the page
- Select Pull Requests
If you are on a busy team, or responsible for a critical repo in your organization, then the need to constantly check on your pull requests manually could get very tedious. With just a template and one line of code, we can take this multi-step process down to a single keystroke:
# Required parameters:
# @raycast.schemaVersion 1
# @raycast.title Open Pull Requests page
# @raycast.mode silent
#
# Optional parameters:
# @raycast.packageName GitHub
# @raycast.icon images/github-logo.png
# @raycast.iconDark images/github-logo-iconDark.png
open https://github.com/pulls/
All scripts have parameters to instruct Raycast on how to process and output your request. You can read more about them here. In the example, we have set the @raycast.mode parameter to silent, which means that the script will run instantly and silently, allowing you to access the newly opened page when you are ready.
Of course, you could change the URL and re-purpose this script for any workflow you wanted such as opening Notion pages, favourite news sites, or social medias.
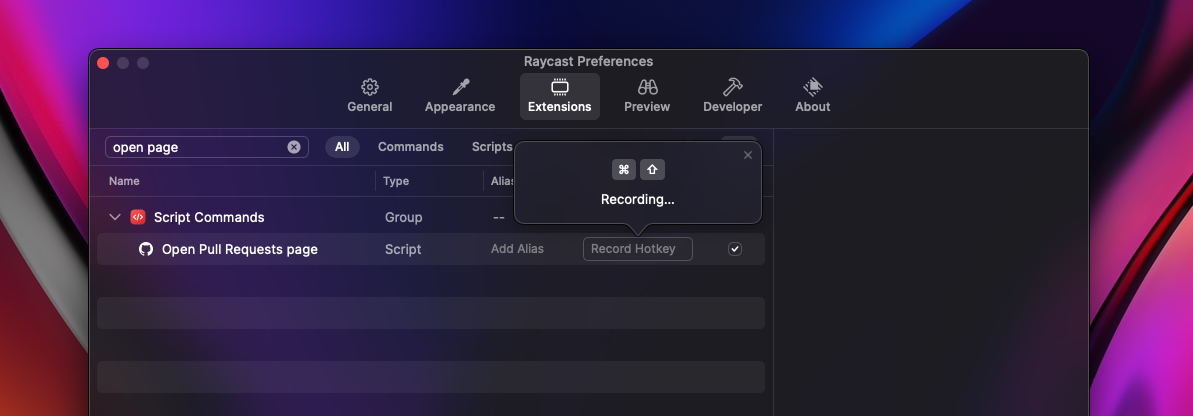
By assigning a hotkey, you can speed up your workflows even further:
So far, so good!
This is a great first step, especially with the addition of the hotkey... but let's say that you are part of a busy team and want to speed up your workflows further, or maybe you are responsible for multiple repos and you want to tailor this script to give you exactly what you need without any fuss.
We can take the script functionality further and utilise the @raycast.mode inline parameter - this will display the data in an easy to access way and allows you to check statistics with a keystroke.
# Required parameters:
# @raycast.schemaVersion 1
# @raycast.title Open Pull Requests
# @raycast.mode inline
#
# Optional parameters:
# @raycast.packageName GitHub
# @raycast.icon images/github-logo.png
# @raycast.iconDark images/github-logo-iconDark.png
#
# Conditional parameters:
# @raycast.refreshTime 5m
require 'json'
require 'net/http'
require 'uri'
# Insert a personal access token (https://github.com/settings/tokens)
API_TOKEN = ''
if API_TOKEN.empty?
puts 'No API token provided'
exit(1)
end
RED = 31
GREEN = 32
YELLOW = 33
uri = URI('https://api.github.com/graphql')
req = Net::HTTP::Post.new(uri)
req['Authorization'] = "token #{API_TOKEN}"
req.body = '{ "query": "query { viewer { pullRequests(first: 10, states:OPEN) { nodes { title number url } } } }" }'
req_options = {
use_ssl: uri.scheme == 'https'
}
res = Net::HTTP.start(uri.hostname, uri.port, req_options) do |http|
http.request(req)
end
if res.code == '200'
result = JSON.parse(res.body)
pull_requests = result['data']['viewer']['pullRequests']['nodes']
if pull_requests.length == 0
message = "No open pull requests 🎉"
puts "\e[#{GREEN}m#{message}\e[0m"
else
color = (pull_requests.length <= 5) ? YELLOW : RED
message = "You have #{pull_requests.length} open pull requests"
puts "\e[#{color}m#{message}\e[0m"
pull_requests.each do |pr|
puts "##{pr['number']} #{pr['title']} (#{pr['url']})"
end
end
else
puts 'Failed loading GitHub pull requests'
exit(1)
end
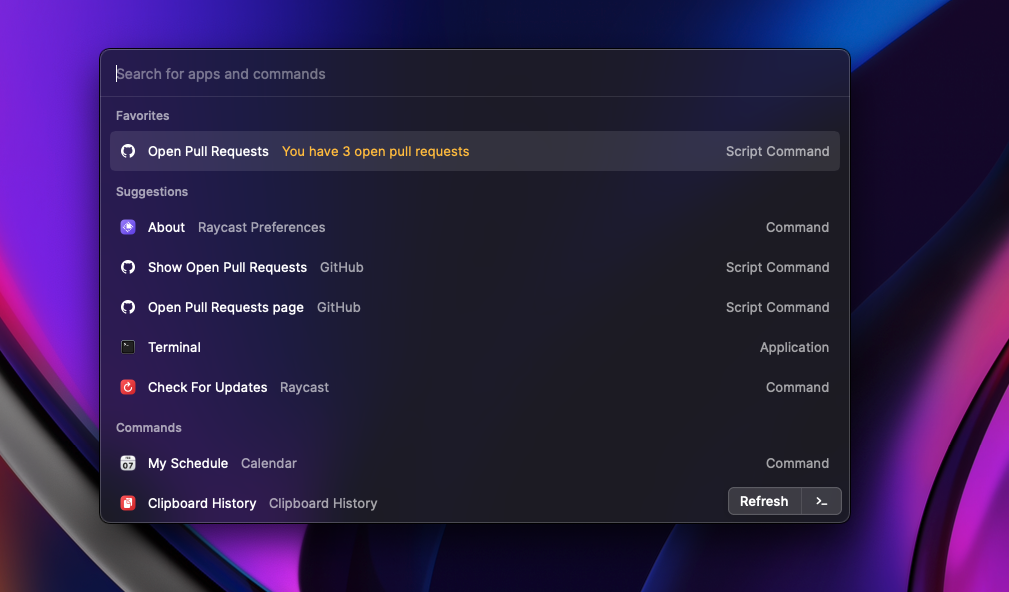
This is a slightly more complex script, utilising both the inline parameter and the refreshTime parameter. Let's break down what this means:
- Firstly, we set the dependencies and parameters: Inline means that the data will be displayed in an easy-to-read format on the Raycast root search (the home screen), enabling you to access your data and required statistics.
Inlinemode is ideal for allowing quick access to smaller data sets. Existing examples built by our community include timezones, statistics, and stock portfolios. - The
refreshTimeparameter is set to 5 minutes for this script. This means that Raycast will automatically run your script in the background every 5 minutes to check for updates; your data will be refreshed and ready for you to view without you having to do anything. You can view the details of this parameter here.
More detail
What if you want to see more data that could fit into inline mode? Raycast can handle that too.
Let's quickly write a Ruby script to utilise Raycast's fullOutput mode to view all of your pull requests in more detail. We support up to 3 arguments to further expand the capabilities of your scripts.
 #!/usr/bin/env ruby

# Required parameters:
# @raycast.schemaVersion 1
# @raycast.title Show Open Pull Requests
# @raycast.mode fullOutput
#
# Optional parameters:
# @raycast.packageName GitHub
# @raycast.icon images/github-logo.png
# @raycast.iconDark images/github-logo-iconDark.png

require 'json'
require 'net/http'
require 'uri'

# Insert a personal access token (https://github.com/settings/tokens)

API_TOKEN = ''

if API_TOKEN.empty?
  puts 'No API token provided'
  exit(1)
end

uri = URI('https://api.github.com/graphql')
req = Net::HTTP::Post.new(uri)
req['Authorization'] = "token #{API_TOKEN}"
req.body = '{ "query": "query { viewer { pullRequests(first: 10 states: OPEN) { nodes { baseRepository { name } title number url } } } }" }'
req_options = {
  use_ssl: uri.scheme == 'https'
}

res = Net::HTTP.start(uri.hostname, uri.port, req_options) do |http|
  http.request(req)
end

if res.code == '200'
  result = JSON.parse(res.body)
  pull_requests = result['data']['viewer']['pullRequests']['nodes']

  if pull_requests.length == 0
    puts 'No open pull requests 🎉'
  else
    puts "You have #{pull_requests.length} open pull requests"
    pull_requests.each do |pr|
      puts "##{pr['number']} #{pr['title']} (#{pr['url']})"
    end
  end
else
  puts 'Failed loading GitHub pull requests'
  exit(1)
end
Raycast can easily be configured to display larger data sets, so you'll always have all of the information you need at your fingertips, ready to view. As we have the URLs of the pull requests now, you can press ⌘ L to get an overview of links in the output which makes it easy to open a specific pull request.
Let's wrap up
By spending a few minutes putting together scripts for your common workflows, you can customize your experience and harness the power of Raycast. We are focused on high-quality UX and want you to have a smooth experience with beautiful UI for any task and with any tool.
Rather than leaving all tabs open in the evening to return to the next day, you could write a script that opens commonly visited sites with just a keystroke.
You can view all API and parameter documentation on our GitHub page. Feel free to browse and try out our community-built scripts, you are welcome to fork and customize them to your needs, or try building your own!
You can find all scripts written in this blog post here.